Wednesday, April 3, 2013

Image Manipulation using PHP and ImageMagicK

So there were a couple of problems with my last image processing functions (http://nodstrum.com/2006/12/09/image-manipulation-using-php/).
1. If you were trying to process a massive image > 1024px×768px it failed.
2. I only accounted for people processing Jpegs.
3. CPU spikes, because of the amount of processing that is being done with the image the CPU is really taking a hit.
4. The functions were really quite long.

These new function will use ImageMagicK, not all servers have ImageMagicK installed by default, check with your hosting provider.

So, here are the functions…
Thumbnail
function createThumbIMK($img, $imgPath, $thumbDir, $suffix, $newWidth, $newHeight) {
  // add in the suffix after the '.' dot.
 $newNameE = explode(".", $img);
 $newName = ''. $newNameE[0] .''. $suffix .'.'. $newNameE[1] .'';
 
  // ImageMagicK doesnt like '/' and 'x' characters in the command line call.
 $uploadedImg = ''. $imgPath .'/'. $img .'';
 $newThumb = ''. $thumbDir .'/'. $newName .'';
 $newRes = ''. $newWidth .'x'. $newHeight .'';
 
  // This makes a command line call to ImageMagicK.
  // My path to ImageMagicK Convert is '/usr/lib/php/bin/convert'
  // 'convert' is a program (UNIX) so no forward slash.
 $ct = system("/usr/lib/php/bin/convert -resize $newRes $uploadedImg $newThumb", $retval);
 
 return $ct;
}
Resize
function createResizedIMK($img, $imgPath, $thumbDir, $suffix, $by) {
  // add in the suffix after the '.' dot.
 $newNameE = explode(".", $img);
 $newName = ''. $newNameE[0] .''. $suffix .'.'. $newNameE[1] .'';
 
  // ImageMagicK doesnt like '/' and 'x' characters in the command line call.
  // And workout the size based on '$by'.
 $uploadedImg = ''. $imgPath .'/'. $img .'';
 $newResized = ''. $reduceDir .'/'. $newName .'';
 list($width, $height, $type, $attr) = getimagesize("$imgPath/$img");
 $newWidth = ($width/$by);
 $newHeight = ($height/$by);
 $newRes = ''. $newWidth .'x'. $newHeight .'';
 
  // This makes a command line call to ImageMagicK.
  // My path to ImageMagicK Convert is '/usr/lib/php/bin/convert'
  // 'convert' is a program (UNIX) so no forward slash.
 $cr = system("/usr/lib/php/bin/convert -resize $newRes $uploadedImg $newResized", $retval);
 
 return $cr;
}
!! Important: you must ensure that when you pass $img to the functions that it has no spaces in it… here is an example (replacing spaced with ‘_’ underscores. Also dont forget to rename the actual file. !!
$imgSafe = str_replace(" ", "_", $img);
rename("$dir/$img", "$dir/$imgSafe");
Here are some examples. Building Original (916K (2576×1932)) Building Thumb (20K (120×90)) Building Resized and Reduced (71K (515×386))

Validating Upload File Size And Type on Client Side

//Validating Upload File Size And Type on Client Side
<script type="text/javascript">
    function onSelect(e) {
        // Array with information about the uploaded files
        var files = e.files;
 
        if (files[0].size > 1048576) {
            alert("File Size Can't be more than 1MB");
            e.preventDefault();
        }
        if (files[0].extension != ".jpg") {
            alert("Just Pictures Files Are Allowed");
            e.preventDefault();
        }
    }
</script>

PHP Security / SQL Security

Web Security: The Big Picture
Whether your site is the web presence for a large multinational, a gallery showing your product range and inviting potential customers to come into the shop, or a personal site exhibiting your holiday photos, web security matters. After the hard work put in to make your site look good and respond to your users, the last thing you want is for a malicious hacker to come along, perform a PHP hack and break it somehow.

There are a number of problems in web security, and unfortunately not all of them have definite solutions, but here we'll look at some of the problems that should be considered every time you set out to write a PHP script to avoid a PHP hack attack. These are the problems which, with well-designed code, can be eliminated entirely. Before looking in detail at the solutions, though, lets take a moment to define the problems themselves.
SQL Injection
In this attack, a user is able to execute SQL queries in your website's database. This attack is usually performed by entering text into a form field which causes a subsequent SQL query, generated from the PHP form processing code, to execute part of the content of the form field as though it were SQL. The effects of this attack range from the harmless (simply using SELECT to pull another data set) to the devastating (DELETE, for instance). In more subtle attacks, data could be changed, or new data added.

Directory Traversal
This attack can occur anywhere user-supplied data (from a form field or uploaded filename, for example) is used in a filesystem operation. If a user specifies “../../../../../../etc/passwd” as form data, and your script appends that to a directory name to obtain user-specific files, this string could lead to the inclusion of the password file contents, instead of the intended file. More severe cases involve file operations such as moving and deleting, which allow an attacker to make arbitrary changes to your filesystem structure.

Authentication Issues
Authentication issues involve users gaining access to something they shouldn't, but to which other users should. An example would be a user who was able to steal (or construct) a cookie allowing them to login to your site under an Administrator session, and therefore be able to change anything they liked.

Remote Scripts (XSS)
XSS, or Cross-Site Scripting (also sometimes referred to as CSS, but this can be confused with Cascading Style Sheets, something entirely different!) is the process of exploiting a security hole in one site to run arbitrary code on that site's server. The code is usually included into a running PHP script from a remote location. This is a serious attack which could allow any code the attacker chooses to be run on the vulnerable server, with all of the permissions of the user hosting the script, including database and filesystem access.

Processing User Data – Form Input Verification & HTML Display
Validating Input And Stripping Tags
When a user enters information into a form which is to be later processed on your site, they have the power to enter anything they want. Code which processes form input should be carefully written to ensure that the input is as requested; password fields have the required level of complexity, e-mail fields have at least some characters, an @ sign, some more characters, a period, and two or more characters at the end, zip or postal codes are of the required format, and so on.

Each of these may be verified using regular expressions, which scan the input for certain patterns. An example for e-mail address verification is the PHP code shown below. This evaluates to true if an e-mail address was entered in the field named 'email'.
preg_match('/^.+@.+\..{2,3}$/',$_POST['email']);
This code just constructs a regular expression based on the format described above for an e-mail address. Note that this will return true for anything with an @ sign and a dot followed by 2 or 3 characters. That is the general format for an e-mail address, but it doesn't mean that address necessarily exists; you'd have to send mail to it to be sure of that.
Interesting as this is, how does it relate to security? Well, consider a guestbook as an example. Here, users are invited to enter a message into a form, which then gets displayed on the HTML page along with everyone else's messages. For now, we won't go into database security issues, the problems dealt with below can occur whether the data is stored in a database, a file, or some other construct.
If a user enters data which contains HTML, or even JavaScript, then when the data is included into your HTML for display later, their HTML or JavaScript will also get included.
If your guestbook page displayed whatever was entered into the form field, and a user entered the following,
Hi, I <b>love</b> your site.
Then the effect is minimal, when displayed later, this would appear as,
Hi, I love your site.
Of course, when the user enters JavaScript, things can get a lot worse. For example, the data below, when entered into a form which does not prevent JavaScript ending up in the final displayed page, will cause the page to redirect to a different website. Obviously, this only works if the client has JavaScript enabled in their browser, but the vast majority of users do.
Hi, I love your site. Its great!<script
language=”JavaScript”>document.location=”http://www.acunetix.com/”;</script>

For a split second when this is displayed, the user will see,
Hi, I love your site. Its great!
The browser will then kick in and the page will be refreshed from www.acunetix.com. In this case, a fairly harmless alternative page, although it does result in a denial of service attack; users can no longer get to your guestbook.
Consider a case where this was entered into an online order form. Your order dispatchers would not be able to view the data because every time they tried, their browser would redirect to another site. Worse still, if the redirection occurred on a critical page for a large business, or the redirection was to a site containing objectionable material, custom may be lost as a result of the attack.
Fortunately, PHP provides a way to prevent this style of PHP hack attack. The functions strip_tags(), nl2br() and htmlspecialchars() are your friends, here.
strip_tags() removes any PHP or HTML tags from a string. This prevents the HTML display problems, the JavaScript execution (the <script> tag will no longer be present) and a variety of problems where there is a chance that PHP code could be executed.
nl2br() converts newline characters in the input to <br /> HTML tags. This allows you to format multi-line input correctly, and is mentioned here only because it is important to run strip_tags() prior to running nl2br() on your data, otherwise the newly inserted <br /> tags will be stripped out when strip_tags() is run!
Finally, htmlspecialchars() will entity-quote characters such as <, > and & remaining in the input after strip_tags() has run. This prevents them being misinterpreted as HTML and makes sure they are displayed properly in any output.
Having presented those three functions, there are a few points to make about their usage. Clearly, nl2br() and htmlspecialchars() are suited for output formatting, called on data just before it is output, allowing the database or file-stored data to retain normal formatting such as newlines and characters such as &. These functions are designed mainly to ensure that output of data into an HTML page is presented neatly, even after running strip_tags() on any input.
strip_tags(), on the other hand, should be run immediately on input of data, before any other processing occurs. The code below is a function to clean user input of any PHP or HTML tags, and works for both GET and POST request methods.
function _INPUT($name)
{
if ($_SERVER['REQUEST_METHOD'] == 'GET')
return strip_tags($_GET[$name]);
if ($_SERVER['REQUEST_METHOD'] == 'POST')
return strip_tags($_POST[$name]);
}

This function could easily be expanded to include cookies in the search for a variable name. I called it _INPUT because it directly parallels the $_ arrays which store user input. Note also that when using this function, it does not matter whether the page was requested with a GET or a POST method, the code can use _INPUT() and expect the correct value regardless of request method. To use this function, consider the following two lines of code, which both have the same effect, but the second strips the PHP and HTML tags first, thus increasing the security of the script.
$name = $_GET['name');
$name = _INPUT('name');

If data is to be entered into a database, more processing is needed to prevent SQL injection, which will be discussed later.
Executing Code Containing User Input
Another concern when dealing with user data is the possibility that it may be executed in PHP code or on the system shell. PHP provides the eval() function, which allows arbitrary PHP code within a string to be evaluated (run). There are also the system(), passthru() and exec() functions, and the backtick operator, all of which allow a string to be run as a command on the operating system shell.

Where possible, the use of all such functions should be avoided, especially where user input is entered into the command or code. An example of a situation where this can lead to attack is the following command, which would display the results of the command on the web page.
echo 'Your usage log:<br />';
$username = $_GET['username'];
passthru(“cat /logs/usage/$username”);

passthru() runs a command and displays the output as output from the PHP script, which is included into the final page the user sees. Here, the intent is obvious, a user can pass their username in a GET request such as usage.php?username=andrew and their usage log would be displayed in the browser window.
But what if the user passed the following URL?
usage.php?username=andrew;cat%20/etc/passwd
Here, the username value now contains a semicolon, which is a shell command terminator, and a new command afterwards. The %20 is a URL-Encoded space character, and is converted to a space automatically by PHP. Now, the command which gets run by passthru() is,
cat /logs/usage/andrew;cat /etc/passwd
Clearly this kind of command abuse cannot be allowed. An attacker could use this vulnerability to read, delete or modify any file the web server has access to. Luckily, once again, PHP steps in to provide a solution, in the form of the escapeshellarg() function. escapeshellarg() escapes any characters which could cause an argument or command to be terminated. As an example, any single or double quotes in the string are replaced with \' or \”, and semicolons are replaced with \;. These replacements, and any others performed by escapeshellarg(), ensure that code such as that presented below is safe to run.
$username = escapeshellarg($_GET['username']);
passthru(“cat /logs/usage/$username”);

Now, if the attacker attempts to read the password file using the request string above, the shell will attempt to access a file called “/logs/usage/andrew;cat /etc/passwd”, and will fail, since this file will almost certainly not exist.
It is generally considered that eval() called on code containing user input be avoided at all costs; there is almost always a better way to achieve the desired effect. However, if it must be done, ensure that strip_tags has been called, and that any quoting and character escapes have been performed.
Combining the above techniques to provide stripping of tags, escaping of special shell characters, entity-quoting of HTML and regular expression-based input validation, it is possible to construct secure web scripts with relatively little work over and above constructing one without the security considerations. In particular, using a function such as the _INPUT() presented above makes the secure version of input acquisition almost as painless as the insecure version PHP provides.
How to Check for PHP Vulnerabilities
The best way to check whether your web site & applications are vulnerable to PHP hack attacks is by using a Web Vulnerability Scanner. A Web Vulnerability Scanner crawls your entire website and automatically checks for vulnerabilities to PHP attacks. It will indicate which scripts are vulnerable so that you can fix the vulnerability easily. Besides PHP security vulnerabilities, a web application scanner will also check for SQL injection, Cross site scripting & other web vulnerabilities.

Acunetix Web Vulnerability Scanner ensures website security by automatically checking for SQL Injection, Cross Site Scripting and other vulnerabilities. It checks password strength on authentication pages and automatically audits shopping carts, forms, dynamic content and other web applications. As the scan is being completed, the software produces detailed reports that pinpoint where vulnerabilities exist. Download the trial version of Acunetix Web Vulnerability Scanner today!

Some comparisons between ImageMagick and GD

While in discussion on a forum the speed of GD against ImageMagick came up and I tried a couple of speed tests.
With the examples below the flower image resize was twice as fast in ImageMagick 0.083450 seconds against 0.160992 seconds in GD. But the text generation image was 35 times faster in GD 0.003110 seconds as apposed to 0.119943 seconds in ImageMagick.
I am told that if you use one of the other ImageMagick API's they are faster.

In reality unless you are doing a lot of processing you are not really going to notice the difference.
I have looked into this a bit further and found that if you are doing a small amount of large image conversions it is quicker to use ImageMagick than GD. If you are doing a lot of smaller image conversions it is better to use GD. This seems to be due to the extra time involved using exec( ). Things can be speed up if you use an API like Imagick.
GD Icon I have uploaded some more GD example code here

GD

Image resized using GD
You will notice that the ImageMagick code has retained the "aspect ratio"
whereas the GD code has resized the image to 100x100.
To get GD to keep the aspect ratio you would have to
do some more calculations on the original image size.

<?php // Temporary upload image name $original_image '../original_images/flowers.jpg'; // Get the image dimensions $size=GetImageSize$original_image ); // Maximum image width $max_width "100"; // Maximum image height $max_height "100"; // Resize the image and save
        
$src_img ImageCreateFromJPEG$original_image ); $thumbnail ImageCreateTrueColor$max_width$max_height ); ImageCopyResampled$thumbnail$src_img0000$max_width$max_height$size[0],$size[1] ); ImageJPEG$thumbnail'flowers_GD.jpg' ); ImageDestroy$thumbnail ); ?>
To keep the aspect ratio based on the original image width:

<?php // Temporary upload image name $original_image '../original_images/flowers.jpg'; // Get the image dimensions $size=GetImageSize$original_image ); // Maximum image width $max_width "100"; // Maximum image height
//$max_height = "100";

$ratio 100/$size[0]; $max_height $size[1]*$ratio;
// Resize the image and save         $src_img ImageCreateFromJPEG$original_image ); $thumbnail ImageCreateTrueColor$max_width$max_height ); ImageCopyResampled$thumbnail$src_img0000$max_width$max_height$size[0],$size[1] ); ImageJPEG$thumbnail'flowers_GD.jpg' ); ImageDestroy$thumbnail ); ?>

ImageMagick

Image resized using ImageMagick
This code was to demonstrate the speed test differences.

<?php // Temporary upload image name $original_image '../original_images/flowers.jpg'; // Get the image dimensions $size=GetImageSize$original_image ); // Maximum image width $max_width "100"; // Maximum image height $max_height "100"; // Resize the image and save exec("convert -size {$size[0]}x{$size[1]} $original_image //
-thumbnail 
{$max_width}x{$max_height} flowers_IM.jpg"); ?>
The code can be reduced to this:

<?php // Temporary upload image name $original_image '../original_images/flowers.jpg'; // Maximum image width $max_width "100"; // Maximum image height $max_height "100"; // Resize the image and save exec("convert $original_image -thumbnail {$max_width}x{$max_height} flowers_IM.jpg"); ?>

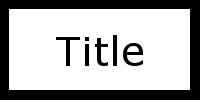
GD

Image created containing some text with GD
<?php
$canvas 
imagecreate200100 );
$black imagecolorallocate$canvas00); $white imagecolorallocate$canvas255255255 );
imagefilledrectangle$canvas9918989$white );
$font "verdana.ttf"; $text "Title"; $size "30";
$box imageftbbox$size0$font$text ); $x = (200 - ($box[2] - $box[0])) / 2; $y = (100 - ($box[1] - $box[7])) / 2; $y -= $box[7];
imageTTFText$canvas$size0$x$y$black$font$text );
imagejpeg$canvas"Label_GD.jpg" );
ImageDestroy$canvas ); ?>

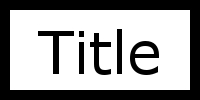
ImageMagick

Image created containing some text with ImageMagick
<?php 
exec
("convert -background white -fill black -pointsize 30 //
-font verdana.ttf -gravity Center -size 180x80 label:
$text //
-mattecolor black -frame 10x10+0+0 Label_IM.jpg"
); ?>

GD

An image watermarked with text using GD
The rotation of the text would not work; I assume you need
to save an extra tempory image and rotate that.

<?php 
$canvas 
imagecreate200100 ); 
$black imagecolorallocate$canvas00);  $white imagecolorallocate$canvas255255255 ); 
imagefilledrectangle$canvas00200100$white ); 
$font "../fonts/verdana.ttf"$text "Sunflower"$size "30"$degrees "30"$photo"../original_images/sunflower.jpg";
$box imagettfbbox$size0$font$text );  $x = (200 - ($box[2] - $box[0])) / 2$y = (100 - ($box[1] - $box[7])) / 2$y -= $box[7]; 
imageTTFText$canvas$size0$x$y$black$font$text ); 
imagecolortransparent $canvas$white ); 
imagerotate$canvas$degrees0); 
imagepng$canvas"temp.png" ); 
ImageDestroy$canvas ); 
$watermark imagecreatefrompng('temp.png');    $watermark_width imagesx($watermark);    $watermark_height imagesy($watermark);    $image imagecreatetruecolor($watermark_width$watermark_height);    $image imagecreatefromjpeg($photo);    $size getimagesize($photo);    $dest_x $size[0] - $watermark_width 100;    $dest_y $size[1] - $watermark_height 200;    imagecopymerge($image$watermark$dest_x$dest_y00$watermark_width$watermark_height50);    imagejpeg($image'watermark_GD.jpg');    imagedestroy($image);    imagedestroy($watermark);   
unlink'temp.png');  ?> 

ImageMagick

An image watermarked with text using ImageMagick
# As the rotate text did not work for GD I have left it off from this example as well.
It is quite easy to rotate the text on ImageMagic you just alter the -annotate operator.

<?php

$font 
"../fonts/verdana.ttf"$text "Sunflower"$size "40"$degrees "30"$photo"../original_images/sunflower.jpg";
exec("convert $photo -font $font -pointsize $size -fill rgba(0,0,0,0.4) //
-gravity north -annotate +0+25 
$text watermark_IM.jpg");  ?>

An other good thing about Imagemagick is it supports a lot more image types. Unlike GD where you have to use imagecreatefromjpeg for jpg's and imagecreatefrompng for png's etc. you can give the same line of code any image type you like; you can then save it as any image type you want and not worry about wether it is a jpg, png, pdf etc.

15 Useful jQuery Image Zoom Plugins

We often need image zoom power in different projects, and the power of jQuery has made this very easy and professional.There are lot of jQuery image zoom plugins which have provided this functionality beautifully.
Today i have collected 15 best and useful jQuery image zoom plugins among the huge list on the internet. I hope these plugins will be helpful for you in several tasks.
You may like other useful jQuery resources,
Let’s have a look into jQuery image zoom plugins.

1. Featured Image Zoomer

Featured Image Zoomer
This script lets you view a magnified portion of any image upon moving your mouse over it. A magnifying glass appears alongside the image displaying the magnified area on demand. The user can toggle the zoom level by using the mousewheel.  It’s great to use on product images, photos, or other images with lots of details you want users to be able to get into on command.

2. jQuery Gzoom Plugin

jQuery Gzoom Plugin
It is an excellent jQuery image zoom plugin with a very useful features like click on plus and minus to zoom, drag the slider to zoom Zoom using mousewheel hover the image, moving mouse hover the image change the pan, click on the image to show in lightbox style and others.

3. Cloud Zoom

Cloud Zoom
Cloud Zoom is a free jQuery image zoom plugin, a comparable alternative to products such as Magic Zoom. Compared to the popular jQZoom plugin, Cloud Zoom is smaller, has more features and more robust compatability across browsers.

4. Nivo Zoom

Nivo Zoom
Nivo Zoom is a nice jQuery image zoom plugin with 5 different zoom types, Optional overlay support, Supports HTML captions, Simple clean & valid markup, Loads of settings to tweak and others.

5. Image Power Zoomer

Image Power Zoomer
Some images are worth a closer look, which is why there’s Image Power Zoomer. It gives any image on your page the ability to be magnified when the mouse rolls over it. A “magnifying glass” that appears over the image lets the user zoom in on any portion of it as it follows the cursor around. Furthermore, the magnification power can be adjusted on the fly by turning the mouse wheel back or forth, just like in many graphics programs.

6. Photo Zoom Out Effect with jQuery

Photo Zoom Out Effect with jQuery
The idea is show some images which are zoomed in initially and when hovering over an image it gets zoomed out. This effect could be used in photography websites or image galleries. Our example uses some black and white images to focus on the effect.

7. Fancy Thumbnail Hover Effect with jQuery

Fancy Thumbnail Hover Effect w jQuery
A beautiful jQuery image zoom with an excellent tutorial. It duplicates nice flash galleries. Nice tutorial by author.

8. Hover Zoom Effect

Hover Zoom Effect
The hover zoom effect basically reverse zooms an image while fading in a label on top of it when the mouse hovers over it. It makes for a pretty slick effect which could be used on thumbnails. As always, you can check out a demo or grab the source right here if you don’t want to read the entire tutorial.

9. AnythingZoomer

AnythingZoomer
You have a small area. You mouse over it. An area pops up giving you a zoomed in closer look. This is a jQuery plugin that does it. I’m not going to tell you what you should use it for or elaborate use-case scenarios. Your own creativity can help you there.

10. jqZoom Evolution

jqZoom Evolution
JQZoom is a javascript image magnifier built at the top of the popular jQuery javascript framework.jQzoom is a great and a really easy to use script to magnify what you want.

11. Zoomer Gallery

Zoomer Gallery
It’s a simple but elegant way of giving your interfaces a nice little shine and at only 2KB in size, it’s both compact and surprisingly easy to use.

12. Fancy Zoom

Fancy Zoom
This plugin is the jQuery version on the fancy zoom effect. As describe on the fancy zoom web site, this effect is providing a smooth, clean, truly Mac-like effect, almost like it’s a function of Safari itself (see the demo below).

13. Image Zoom 2.0

Image Zoom 2.0
This plug-in makes links pointing to images open in the “Image Zoom”. Clicking a link will zoom out the clicked image to its target-image. Click anywhere on the image or the close-button to zoom the image back in. Only ~3k minified.

14. Easy Image Zoom

Easy Image Zoom
The task was to create a script that will allow users to see large details of the product while moving cursor over medium sized image. During the process I decided to create a jQuery plugin and share it with you guys!

15. Zoomy

Zoomy
Zoomy is a quick and easy plugin that will zoom into a picture. You only need two copies of one image first the display image and then the zoom image.