Tuesday, August 14, 2012

How to Changing The Site URL in Wordpress

On the Settings->General screen in a single site installation of WordPress, there are two fields named "WordPress address (URL)" and "Site address (URL)". These are also known as the "Home" and "Site URL" settings. They are important settings, since they control where WordPress thinks your site is located. They control the display of the URL in the admin section of your page as well as the front end, and are used throughout the WordPress code.
  • The "Home" setting is the address you want people to type in their browser to reach your WordPress blog.
  • The "Site URL" setting is the address where your WordPress core files reside.
Note: Both settings should include the http:// part and should not have a slash "/" at the end.
Every once in a while, somebody finds a need to manually change (or fix) these settings. Usually this happens when they change one or both and discover that their site no longer works properly. This can leave the user with no easily discoverable way to correct the problem. This article tells you how to change these settings directly.
Additional information is presented here for the case where you are moving WordPress from one site to another, as this will also require changing the site URL. You should not attempt to use this additional information if you're only attempting to correct a "broken" site.
Alert! These directions are for single installs of WordPress only. If you are using WordPress MultiSite, you will need to manually edit your database.

Contents


Changing the Site URL

There's four easy methods to change the Site URL manually. Any of these methods will work and perform much the same function.

Edit wp-config.php

It is possible to set the site URL manually in the wp-config.php file.
Add these two lines to your wp-config.php, where "example.com" is the correct location of your site.
define('WP_HOME','http://example.com');
define('WP_SITEURL','http://example.com');
This is not necessarily the best fix, it's just hardcoding the values into the site itself. You won't be able to edit them on the General settings page anymore when using this method.

Edit functions.php

If you have access to the site via FTP, then this method will help you quickly get a site back up and running, if you changed those values incorrectly.
1. FTP to the site, and get a copy of the active theme's functions.php file. You're going to edit it in a simple text editor (like notepad) and upload it back to the site.
2. Add these two lines to the file, immediately after the initial "<?php" line.
update_option('siteurl','http://example.com/blog');
update_option('home','http://example.com/blog');
Use your own URL instead of example.com, obviously.
3. Upload the file back to your site, in the same location. FileZilla offers a handy "edit file" function to do all of the above rapidly; if you can use that, do so.
4. Load the login or admin page a couple of times. The site should come back up.
5. Repeat the above steps, but remove those lines. IMPORTANT: Do NOT leave those lines in there. Remove them immediately after the site is up and running again.
If there is no functions.php file in the theme:
Create a new text file called "functions.php".
Edit it with notepad, and add this text to it, using your own URL instead of example.com:
<?php
update_option('siteurl','http://example.com/blog');
update_option('home','http://example.com/blog');
?>
Upload that to your theme directory, then proceed as stated above. Remove the file afterwards.
>>>
Here are some additional details that step you through transfering a LAN-based wordpress site into an externally accessible site as well enabling editing the wordpress site from inside the LAN.
Two important keys are router/firewall modifications and the "wait 10+ minutes" after making the changes at the end.
-using ssh to log into your server (nano is a server preinstalled text editor)
-$ nano /var/www/books/wp-content/themes/twentyeleven/functions.php
-add lines just after >php?
    update_option('siteurl','http://your.site.url:port/yourblog');
    update_option('home','http://your.site.url:port/yourblog');
-refresh your web browser using your external site url
   http://your.site.url:port/yourblog
-$ nano /var/www/books/wp-content/themes/twentyeleven/functions.php
-remove those lines you just added (or comment them out)
-access your router (these steps are for pfSense, other routers should have similar settings to look for/watch out for)
-add to firewall/nat table a line like this
        wan/tcp/port/LAN.server.IP/80
-add to firewall/rules table a line like this
        tcp/*/port/LAN.server.IP/port/*
-uncheck the box at System/advanced/network address translation/Disable NAT Reflection
       "Disables the automatic creation of NAT redirect rules for access to your public IP addresses from within your internal networks. Note: Reflection only works on port forward type items and does not work for large ranges > 500 ports."
Then go do something for ten minutes and when you get back see if the external url http://your.site.url:port/yourblog from a LAN browser brings the page up correctly.

Relocate method

WordPress supports an automatic relocation method intended to be a quick assist to getting a site working when relocating a site from one server to another.

Steps

1. Edit the wp-config.php file.
2. After the "define" statements (just before the comment line that says "That's all, stop editing!"), insert a new line, and type: define('RELOCATE',true);
3. Save your wp-config.php file.
4. Open a web browser and manually point it to wp-login.php on the new server. For example, if your new site is at http://www.mynewdomain.com, then type http://www.mynewdomain.com/wp-login.php into your browser's address bar.
5. Login as per normal.
6. Look in your web browser's address bar to verify that you have, indeed, logged in to the correct server. If this is the case, then in the Admin back-end, navigate to Settings > General and verify that both the address settings are correct. Remember to Save Changes.
7. Once this has been fixed, edit wp-config.php and either completely remove the line that you added (delete the whole line), comment it out (with //) or change the true value to false if you think it's likely you will be relocating again.
Note: When the RELOCATE flag is set to true, the Site URL will be automatically updated to whatever path you are using to access the login screen. This will get the admin section up and running on the new URL, but it will not correct any other part of the setup. Those you will still need to alter manually.

Changing the URL directly in the database

If you know how to access phpMyAdmin on your host, then you can edit these values directly to get you up and running again.
  1. Backup your database and save the copy off-site.
  2. Login to phpMyAdmin.
  3. Click the link to your Databases.
  4. A list of your databases will appear. Choose the one that is your WordPress database.
  5. All the tables in your database will appear on the screen.
  6. From the list, look for wp_options. Note: The table prefix of wp_ may be different if you changed it when installing.
  7. Click on the small icon indicated as Browse.
  8. A screen will open with a list of the fields within the wp_options table.
  9. Under the field option_name, scroll down and look for siteurl.
  10. Click the Edit Field icon which usually is found at the far left at the beginning of the row.
  11. The Edit Field window will appear.
  12. In the input box for option_value, carefully change the URL information to the new address.
  13. Verify this is correct and click Go to save the information.
  14. You should be returned to your wp_options table.
  15. Look for the home field in the table and click Edit Field. Note There are several pages of tables inside wp_options. Look for the > symbol to page through them.
  16. In the input box for option_value, carefully change the URL information to the new address.
  17. Verify this is correct and click Go to save the information.

Moving Sites

When moving sites from one location to another, it is sometimes necessary to manually modify data in the database to make the new site URL information to be recognized properly. Many tools exist to assist with this, and those should generally be used instead of manual modifications.
This is presented here as information only. This data may not be complete or accurate.
You should read the Moving WordPress article first, if attempting to move WordPress from one system to another.

Altering Table Prefixes

Like many WordPress administrators, you may be running several WordPress installations off of one database using various wp-config.php hacks. Many of these hacks involve dynamically setting table prefixes, and if you do end up altering your table prefix, you must update several entries within the prefix_usermeta table as well.
As in the above section, remember that SQL changes are permanent and so you should back up your database first:
If you are changing table prefixes for a site, then remember to alter the table prefix in the usermeta tables as well. This will allow the new site to properly recognize user permissions from the old site.
UPDATE `newprefix_usermeta` SET `meta_key` = REPLACE( `meta_key` , 'oldprefix_', 'newprefix_' );

Changing Template Files

In your WordPress Theme, open each template file and search for any manually entered references to your old domain name and replace it with the new one. Look for specific hand coded links you may have entered on the various template files such as the sidebar.php and footer.php.
WordPress uses a template tag called bloginfo() to automatically generate your site address from information entered in your Administration > Settings > General panel. The tag in your template files will not have to be modified.

Changing the Config file

You will need to update your WordPress configuration file if your database has moved or changed in certain ways.
  1. You will only need to modify the config file if:
    1. your database has moved to another server and is not running on your localhost
    2. you have renamed your database
    3. you have changed the database user name
  2. "'Make a backup copy of your wp-config.php file.'"
  3. Open the wp-config.php file in a text editor.
  4. Review its contents. In particular, you are looking for the database host entry.
  5. Save the file.
At this point, your WordPress blog should be working.

Verify the Profile

  1. In your Administration Panels go to Settings > General . Here you will verify that the changes you made in Changing the URL above, are correct.
  2. Verify that the reference in your WordPress URL contains the new address.
  3. Verify that the reference in your "Blog URL" contains the new address.
  4. If you have made changes, click Save Changes.

Changing the .htaccess file

After changing the information in your Administration > Settings > General panel, you will need to update your .htaccess file if you are using Permalinks or any rewrites or redirects.
  1. Make a backup copy of your .htaccess file. This is not a recommendation but a requirement.
  2. Open the .htaccess file in a text editor.
  3. Review its contents, looking for any custom rewrites or redirects you entered. Copy these to another text file for safe keeping.
  4. Close the file.
  5. Follow the instructions on the Permalinks SubPanel for updating your Permalinks to the .htaccess file.
  6. Open the new .htaccess file and check to see if your custom rewrites and redirects are still there. If not, copy them from the saved file and paste them into the new .htaccess file.
  7. Make any changes necessary in those custom rewrites and redirects to reflect the new site address.
  8. Save the file.
  9. Test those redirects to ensure they are working.
If you make a mistake, you can Restoring Your Database From Backup from your backup and try this again. So make sure it is right the first time.

Additional items of note

There are other things you may wish to change in order to correct URLs when moving sites.
  1. Images link: image links are stored in "post_content" in the wp_posts table. You can use the similar code above to update image links.
  2. wp_options: Besides the "siteurl" and "home" items mentioned above, there are other option_value which also need revision, such as "upload path", and some plugin items (depends on what you've installed, such as widgets, stats, DMSGuestbook, sitemap, etc.)
  3. Do a FULL database search for any items left. MAKE SURE you know what you are changing. and go through each item for possible improper replacement.
  4. If you a running a network / have multiple sites, you will need to replace instances of the URL in the database. They are stored in many tables, including each one of the sites (blogs). Be careful in what you replace and be sure you know the meaning of the field before changing it. See the Important GUID note below for an example of what not to change.
How To: Move Your WordPress Blog to a New Domain - Using the Export/Import feature to move a blog to a new domain

Important GUID Note

When doing the above and changing the URLs directly in the database, you will come across instances of the URL being located in the "guid" column in the wp_posts tables.
It is critical that you do NOT change the contents of this field.
The term "GUID" stands for "Globally Unique Identifier". It is a field that is intended to hold an identifier for the post which a) is unique across the whole of space and time and b) never, ever changes. The GUID field is primarily used to create the WordPress feeds.
When a feed-reader is reading feeds, it uses the contents of the GUID field to know whether or not it has displayed a particular item before. It does this in one of various ways, but the most common method is simply to store a list of GUID's that it has already displayed and "marked as read" or similar.
Thus, changing the GUID will mean that many feedreaders will suddenly display your content in the user's reader again as if it was new content, possibly annoying your users.
In order for the GUID field to be "globally" unique, it is an accepted convention that the URL or some representation of the URL is used. Thus, if you own example.com, then you're the only one using example.com and thus it's unique to you and your site. This is why WordPress uses the permalink, or some form thereof, for the GUID.
However, the second part of that is that the GUID must never change. Even if you shift domains around, the post is still the same post, even in a new location. Feed readers being shifted to your new feeds when you change URLs should still know that they've read some of your posts before, and thus the GUID must remain unchanged.
Never, ever, change the contents of the GUID column, under any circumstances.
One exception is attachment media: Attachment media locations are stored as a URL in the GUID. If the default uploads folder needs to be changed to a different location, then the media URL will need to be changed in the post_content and guid columns of the posts table. For example, if the default uploads folder is changing from wp-content/uploads to images:
UPDATE wp_posts SET post_content = REPLACE(post_content,'www.domain.com/wp-content/uploads','www.domain.com/images');
UPDATE wp_posts SET guid = REPLACE(guid,'www.domain.com/wp-content/uploads','www.domain.com/images');

Solve : jQuery.easing [jQuery.easing.def] is not a function

How to solve  jQuery.easing [jQuery.easing.def] is not a function problem ?

Error: jQuery.easing [jQuery.easing.def] is not a function
Is caused when JQuery javascript doesn’t load before the plugin js. To fix it, you just need to go into the jquery.easing.1.3.js file and wrap it with

Solution :

$(document).ready(function() {
 
 /* Your 
Code
Here.. */
 
 });


Uniprogy Couponic Add a New Field

I'd like to know if anyone can help me on customizing the contact us page.
I'd like to add text to the end of the page (address phones etc.)
H
ow can we add new text fields on the form ?
==================================================

Well there are two ways to do this. One requires a bit of programming. Modifying the custom module to do the work for you. I think I will leave that to the admin of this forum to do a how to on that. The quickest way is not always the best in the long term. However let me give you the quick way. You just have to watch your updates to ensure that is doesn't change your "additions" to your form.

You can open /protected/modules/base/worklets/WBaseContact.php. You will see the following:

PHP Code:
    public function properties()
    {
        return array(
            
'elements' => array(
                
'name' => array('type' => 'text'),
                
'email' => array('type' => 'text'),
                
'subject' => array('type' => 'text'),
                
'message' => array('type' => 'textarea'),               
            ),
            
'buttons' => array(
                
'submit' => array('type' => 'submit',
                    
'label' => $this->t('Send'))
            ),
            
'model' => $this->model
        
);
    }  
To add text you can add as part of the elements section like the following:

PHP Code:
    public function properties()
    {
        return array(
            
'elements' => array(
                
'name' => array('type' => 'text'),
                
'email' => array('type' => 'text'),
                
'subject' => array('type' => 'text'),
                
'message' => array('type' => 'textarea'),
                
'<br/><h4> Our Address </h4><br/>',
                
'123 High Street<br/>',
                
'Somewhere, OT 12345',
            ),
            
'buttons' => array(
                
'submit' => array('type' => 'submit',
                    
'label' => $this->t('Send'))
            ),
            
'model' => $this->model
        
);
    }  
Add as many lines as you want. 

Now to add text fields you have to not only change here by adding a in the elements array:

PHP Code:
                'new_field' => array('type' => 'text'),  
But to get it to work properly you will have to change the following script:

/protected/modules/base/models/MBaseContactForm.php and find the following:

PHP Code:
    public function attributeLabels()
    {
        return array(
            
'name' => $this->t('Full Name'),
            
'email' => $this->t('Email Address'),
            
'subject' => $this->t('Subject'),
            
'message' => $this->t('Message'),
        );
    }  
And for the new_field add as following:

PHP Code:
    public function attributeLabels()
    {
        return array(
            
'name' => $this->t('Full Name'),
            
'email' => $this->t('Email Address'),
            
'subject' => $this->t('Subject'),
            
'message' => $this->t('Message'),
            
'new_field' => $this->t('My new field label/text'),
        );
    }  
Then at the top of the script you need to add the new field like:

PHP Code:
    public $name;
    public 
$email;
    public 
$subject;
    public 
$message;
    public 
$new_field// New Field Added  
This is not tested code. I have done similar. You may have to play with it. However as I stated earlier you will have to monitor changes to these two scripts as updates occur.

If this doesn't work let me know. I will modify what I have posted.

Now this will change the base contact page. If you need a new contact page then that is a different process.

Superb Slideshow in Wordpress

Slideshow script that incorporates some of your most requested features all rolled into one. Each instance of a fade in slideshow on the page is completely independent of the other, with support for different features selectively enabled for each slideshow.
  • Fade in effect that has the current image fading over the previous one.
  • Automatic slideshow.
  • Slideshow can be set to stop rotating after N cycles.
  • Each slide can be optionally hyperlinked.
  • Each slide can have an optional description associated with it.
  • Descriptions can either be set to show on demand (when the mouse rolls over the slide), or be always visible until explicitly dismissed.
  • Persistence of last viewed slide supported, so when the user reloads the page, the slideshow resumes from the last slide.
  • Slideshow automatically pauses onMouseover.
Live demo available demo on side bar and below. This is XML based image slideshow to add/update/delete images use “superb-slideshow.xml” XML file

Installation instruction and configuration

Option 1
  • Download the plugin superb-slideshow.zip from download link.
  • Unpack the *.zip file and extract the /superb-slideshow/ folder.
  • Drop the ‘superb-slideshow’ folder into your ‘wp-content/plugins’ folder.
  • In word press administration panels, click on plug-in from the menu.
  • You should see your new ‘superb slideshow’ plug-in listed under Inactive plug-in tab.
  • To turn the word presses plug-in on, click activate.
Option 2
  • Go to ‘add new’ menu under ‘plugins’ tab in your word-press admin.
  • Search ‘superb slideshow’ plugin using search option.
  • Find the plugin and click ‘Install Now’ link.
  • Finally click activate plug-in link to activate the plug-in.
Option 3
  • Download the plugin superb-slideshow.zip from download link.
  • Go to ‘add new’ menu under ‘plugins’ tab in your wordpress admin.
  • Select upload link (top link menu).
  • Upload the available superb-slideshow.zip file and click install now
  • Finally click activate plug-in link to activate the plug-in.

Plugin demo

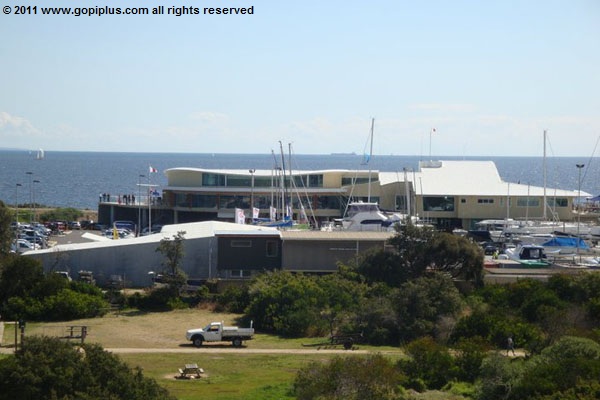
Australia Melbourne st kilda beach collection 3
Frequently asked questions

Q1. How to arrange the width & height of the slideshow?
Go to ‘Superb Slideshow’ link under SETTING tab to change these settings.
Q2. How to change the slide Fade Duration, Pause, Cycles?
Go to ‘Superb Slideshow’ link under SETTING tab to change these settings.
Q3. How to add more image?
1. Upload your images into your server (Use media WordPress dashboard menu to upload images).
2. Take the “superb-slideshow.xml” XMl file from plugin folder.
3. Create new image node like below (add imagepath, link, title, target)
<image>
<path>wp-content/plugins/superb-slideshow/images/gSlide11.jpg</path>
<target>_new</target>
<title>Click to see Superb Slideshow demo</title>
<link>http://www.gopiplus.com/work/2010/07/18/superb-slideshow/</link>
</image>

Plugin configuration

Drag and Drop the Widget : Go to widget page under Appearance tab, Drag and drop ‘Superb Slideshow’ widget into your side bar. its very easy.
Add the gallery in the Posts or Pages : Copy and paste the given short code into pages or posts.
[superb-slideshow=filename=_live.xml&width=600&height=350]
Add directly in the theme : Use this code, <?php if (function_exists (sswld_show)) sswld_show(); ?> to add this plugin to your Theme files.

Requirements/Restrictions!

  1. Works with WordPress 2.7+
  2. PHP 4.5+ or above with dom library support.
  3. See your phpinfo file to check DOM/XML enabled or not.
  4. To work this plugin DOM/XML should be in enabled mode (this is default in enabled mode, so no problem).
  5. If any problem in the close button display; take superb-slideshow/inc/superb-slideshow.js and goto 3rd line and replace the image path with full URL.

Contact Form in Wordpress


A contact form is a great way to offer your readers the ability to get in touch, without giving out your personal email address.
Each contact form can easily be customized to fit your needs. When a user submits your contact form, the feedback will be filtered through Akismet to make sure it’s not spam. Any legitimate feedback will then be emailed to you, and added to your feedback management area.

Add a new contact form

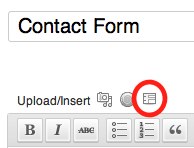
You can add contact forms to both posts and pages. Simply click the new “add contact form” media button.
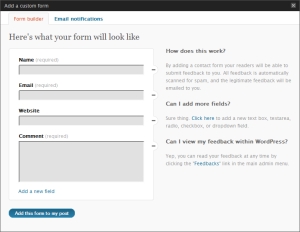
Doing so will bring up a screen where you can customize the fields that will be displayed on your contact form.
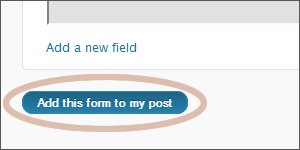
Once you are happy with your contact form, you’ll want to save it by clicking the blue “Add this form to my post” button.
Doing so will convert your form to shortcode which will be inserted into your post.
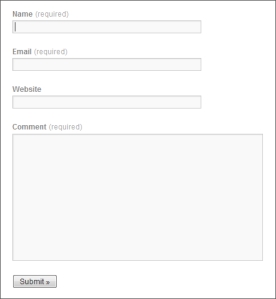
Once you publish your post, this shortcode will be transformed into a fully functional contact form.

Edit an existing contact form

To edit an existing contact form, simply click the small add contact form media icon after you’ve already saved a form. Your existing contact form will be loaded into the editor. Alternatively, you have the option ofediting the shortcode yourself instead of using the editor.

Add a field

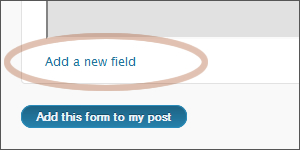
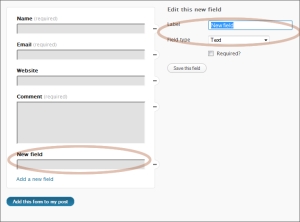
Adding additional fields to your contact field couldn’t be easier. Simply click the “Add a new field” link.
A new field will be added to the bottom of your form, and editing options will be added to the right column.
Label The label field is the description seen on the top of each field (i.e. Name, Email, Website, etc…)
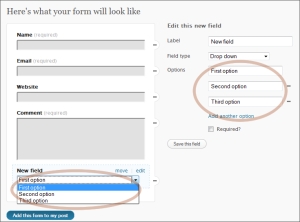
Field Type The field type dropdown allows you to select the type of form element that you would like to use (i.e. textbox, dropdown, radio button, etc…).
Required Clicking the required checkbox will force users to fill out this field before they can submit your contact form. If they skip a required field, they’ll see an alert instructing them to fill out the field before they submit the form.
Options Should you select dropdown, or radio button as a field type, you will be presented with a fourth option that allows you to add select options.

Edit a field

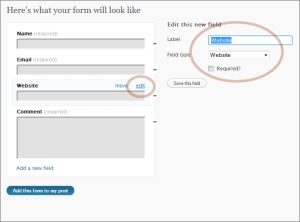
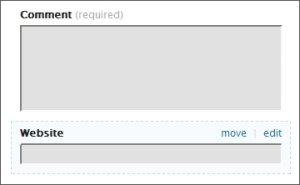
To edit a field, just move your mouse over the field you’d like to edit and click the “edit” link. Once you click this link, you’ll be able to edit the field on the right.
When you’re happy with your changes, click the gray “Save this field” button. Once you are done making changes to your form, click the blue “Add this form to my post” button.

Delete a field

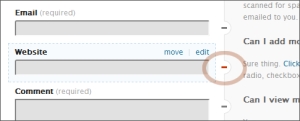
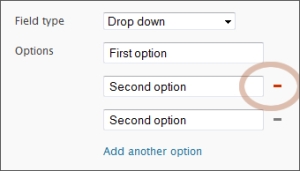
To delete a field you’ll want to click the negative sign next to any field.
When working with dropdown or radio options, you can also delete options.

Reorder fields

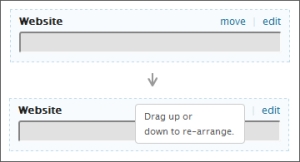
Want to reorganize your fields? No worries, just mouse over the field that you’d like to move. Move your mouse over the “move” link. You’ll see a box that says “Drag up or down to re-arrange”.
Click the “move” link and hold down your left mouse button while you drag the form field to the position you’d like it to be in.
Save your form, by clicking the blue “Add this form to my post” button and you are set.

Notification preferences

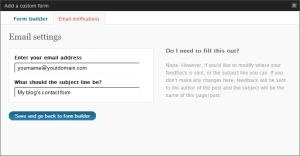
When a user submits your contact form, it will be emailed to the author of the post/page, and the subject line will be the title of your post. If you wish, you can change both the recipient and the email subject of your emails by clicking the “Email notifications” tab. Separate recipient emails with a comma to send to multiple recipients.

Feedback management

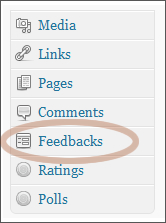
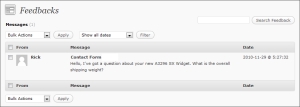
You can read all feedback sent through your contact form in your feedback management area. Just click the “Feedbacks” link in your left-hand menu.
You’ll be able to manage your feedback just like you’d manage comments.
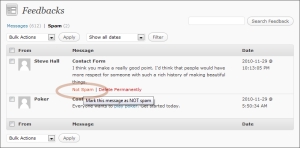
If legitimate feedback is marked as spam, you can click the “not spam” link.

Shortcode reference

Saving a default form will produce the following shortcode:
[contact-form]
[contact-field label="Name" type="name" required="true" /]
[contact-field label="Email" type="email" required="true" /]
[contact-field label="Website" type="url" /]
[contact-field label="Comment" type="textarea" required="true" /]
[/contact-form]
Each contact form shortcode must start with [contact-form] and end with [/contact-form]
Fields can be added or removed from the shortcode manually. For instance, if you wished to remove the website textbox, you’d simple remove that line, like this:
[contact-form]
[contact-field label="Name" type="name" required="true" /]
[contact-field label="Email" type="email" required="true" /]
[contact-field label="Comment" type="textarea" required="true" /]
[/contact-form]
Each field is wrapped in a [[contact-field /]] tag.
The available field attributes are as follows:
label Gives the field a descriptive label
type Available options include:
  • text – Displays a regular single line text box
  • textarea – Displays a multi-line text box
  • radio – Displays radio options
  • checkbox – Displays a single checkbox
  • select – Displays a drop down with multiple options
  • email – Displays a single line text box
  • name – Displays a single line text box
  • url – Displays a single line text box
required If you’d like the field to be required, add required=”true” if not, simply leave this out.
options Select and radio fields have a fourth option called “options”. This is a comment separated list of all the options available within the drop down or radio field. An example would be
[[contact-field label="Sex" type="radio" options="Female,Male" /]]

Additional Info

  • Your email addresses are never shown in the form directly, and the sender never learns it unless you reply to the email.
  • Any blog users with Editor or Administrator roles can see feedbacks.
  • All contact form messages are filtered through Akismet, so the amount of spam you receive will be minimal, if not zero.
  • Visitors can type anything into the name and email boxes, so it is easy to fake an identity. If a logged-in WordPress.com user sends you a message, the email will tell you that it was sent by a verified user and you can trust the name and email. As with anything online, know that anonymity is both a curse and a blessing.
  • You can include any text or other allowed elements above or below the contact form.
  • If you have Custom CSS, you can customize the look of the form.
  • Each post, page, and text widget will only display one contact form. You can have multiple contact forms in the sidebar by using multiple text widgets.
  • Self-hosted/installed WordPress(.org) users can enjoy the same functionality with the Jetpack plugin.
Please note that the contact form offers no security beyond that of a regular email, so it should never be used for sensitive information such as credit card numbers.